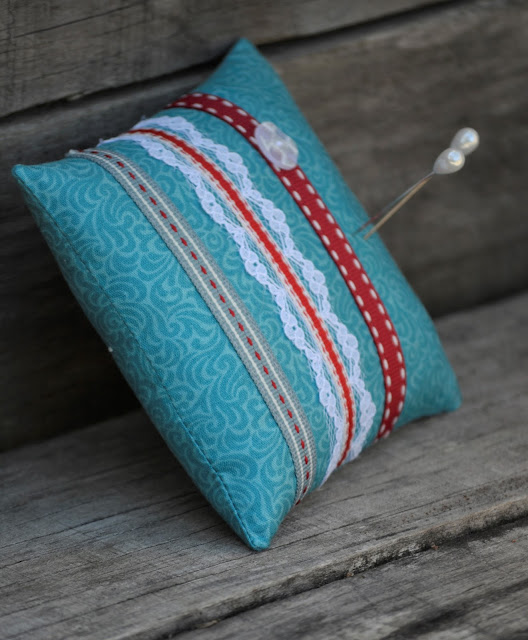
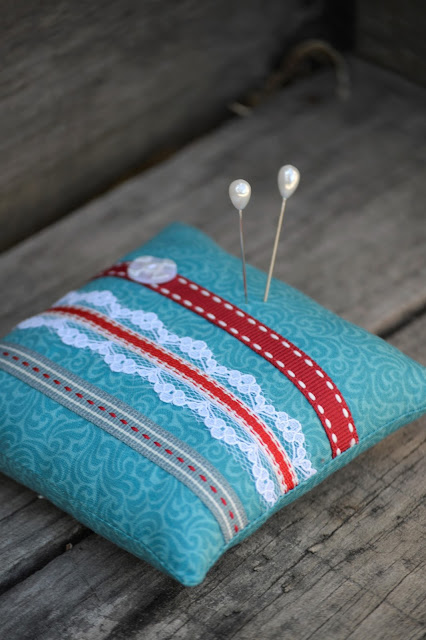
The
tutorial you have been awaiting is here, my dear readers!
Brew
yourself a cup of tea, pull up a comfy chair and let us discuss one of the
happiest of subjects…sewing.
♥
What
I love about these pin cushions is that they are elegant, practical and
require very little effort indeed…
I
would even recommend this project to a beginner…
Oh and before I forget...I have decided to extend my special giveaway by another few days...it will end on February 6th.
If you would like to join in the delights, please do visit my giveaway post here...♥
~
On
to the tutorial…
Let
us begin by selecting the fabric we wish to use.
I have used a plain design for this pin cushion...
Using
a ruler and rotary cutter (a fabulous tool), cut two 5 inch by 5 inch squares
of your fabric and lay aside.
Now
look through your ribbon and lace collection and choose three or four pieces which
coordinate nicely with your fabric.
Be
creative – I like to sew narrow ribbon on the edge of my lace, but it is not
necessary.
Cut
ribbons and/or lace a little bigger than 5 inches.
Now
pin the ribbon and/or lace in place.
I
like to measure and mark with a pen where each piece should go so as to ensure
straight sewing.
Now
for the exciting bit… ♥
You may have to thread your machine several times – although
it does take a little longer, matching
up cotton to each length of ribbon and/or lace really creates a stunning effect
which is pleasing to the eye.
Note: I loosened the tension and increased the size
of the stitches on my machine so that the ribbon and lace wouldn’t pull the
fabric inwards.
Once
you have neatly stitched the ribbon and/or lace in place, use an iron to press
flat on the wrong
side of the fabric as you don’t want to melt the ribbon and/or lace… I speak
from experience here. {{smiles}}
Place
fabric squares right sides together and pin.
Sew
all the way around the square, leaving a small opening on one side so as to
turn the
cushion right way around.
I used a ¼
inch seam allowance.
Use
a crochet hook, knitting needle or a blunt pair of scissors to press the
corners of the pin cushion out.
Use
an iron to open and press the side seams being careful not to go over the ribbon.
Fill
the pin cushion with stuffing.
Sometimes
I add a strongly scented teabag to give the pin cushion a delicious fruity
flavour! {{smiles}}
Once
the pin cushion is filled evenly, sew the opening closed using mattress stitch.
You
are almost done…♥
Now
decide where a button or satin rose (or anything else that takes your fancy)
should go to add the finishing touch to your little pin cushion!
…And
there you are…a beautifully elegant pin cushion!
A
charming gift for a friend who loves sewing or for yourself! {{smiles}}
Did you spot my pin cushion in this tutorial?
~
I
have also restocked my little Etsy Shoppe with bookmarks
and pin cushions, including this one and offering FREE SHIPPING worldwide on ALL
items for a limited time only! Stop be here...♥
*Pins not included.
~
I
hope the month of February is most
beautiful one for you, sweet friends…
I
am once again working in the garden alongside my little sisters, creating
something of a paradise for us as
we so love to sit outside with a cup tea and chat or browse through an
inspirational magazine…
I’d
simply love to hear how you get along with these pin cushions should you decide
to make one…or two or more!
Do
drop me a line in the comment box or email me…
With
love and joy,
Kelly-Anne
~
Today I am sharing this sewing project with...


Good Morning Dear Miss Kelly-Anne!
ReplyDeleteIt is snowing here in Maine this morning...so I am sitting here with a cup of tea reading your lovely tutorial! You did such a fabulous job explaining how you make these lovely pincushions! I was just thinking that they would be a sweet gift for the ladies in my sewing circle! I especially love your idea about adding the sweet smelling teabag! Thank you so much for sharing this tutorial with us!
Have a blessed day...
With love,
Mrs. Laura
I love browsing your beautiful creations and seeing all the new things you create! Darling little pin cushions, especially pretty with the ribbons down the front!
ReplyDeleteGood morning, sweet friend! Your pincushion tutorial is perfect and it is so very cute! I love the extra touches of ribbon and the button. All of your bookmarks and pincushions are beautiful- you should sell them like crazy!
ReplyDeleteOh, how I'd love to be in the garden right now! I bought seeds in anticipation and although we've had warmer than usual weather, I'm afraid winter is not done yet. So patience is my motto for now. I'm working on inside projects to keep me content. :-)
Have a wonderful week filled with His blessings!
Cecilia
Good morning Kelly Anne,
ReplyDeleteThis seems like such an easy tutorial to follow. Your pin cushions are so adorable....and I love your bookmarkers and pin cushion sets. :)
You do such a beautiful job sewing.
Hope you have a sweet day.
Love
Ashley
A happy day to you, sweet Kelly-Anne! My, what a fun and charming tutorial. Your pin cushions are ever so lovely and of course I simply love the addition of lace and ribbon {{smiles}}
ReplyDeleteThank you for such a wonderful and thorough tutorial. When I have some free time I would love to make one or two of these sweeties.
And your new shoppe items are ever so pretty! You are indeed a fabulous seamstress.
Love and hugs to you!
These pin cushions are so cute, Kelly-Anne. And I see one of them is similar to the colors of my felt envelope. I'm starting to like those together, and how nice that your mom decorated her kitchen with that. It must look so charming. I really like the pin cushion with the words on it. Have a nice time in the garden. You are so lucky to have all those sisters by your side, Kelly-Anne. Happy February!
ReplyDelete~Sheri
Happy February, my friend!
ReplyDeleteOh, I am so happy that you shared this tutorial! I know that I shall make some of these in the future...they are quite splendid! I absolutely love the fabrics you chose. I think I always mention that, but, your fabrics are some of the prettiest, truly.
Hope your day is a lovely one and that this month is beautifully blessed!
Lots of love and joy,
Libby
What beautiful products you have, Kelly-Anne! I really should try making one of those pincushions soon! The pincushion and bookmark sets and beautiful, I absolutely adore the bookmarks you sent me, I use them every day in my Bible!
ReplyDeleteLove and hugs to you, sweet friend! {{smiles}}
An excellent tutorial, such a pretty way to keep your pins neat and tidy. I need to make one of these! My pins are all in a dish, and they would look so much better in a gorgeous little cushion! I like the idea of adding something scented inside the cushion too! I hope you and your sisters enjoy the lovely sunshine and ice tea, sounds lovely! It is cold and sunny here today, was down to 5 degrees last night. I've been doing a little sewing, maybe I'll get around to posting about it soon. Hugs to you today dear friend, so nice to stop by for a visit :)
ReplyDeleteSo pretty! My favourite is the grey and blue vintage floral pattern.
ReplyDeleteHi Kelly-Anne
ReplyDeleteThose items are lovely. I cannot decide which are my favorites. The bookmarks are special to me,because I my sisters and I collect them. Thank you for the tutorial. I enjoy your blog so much and look forward to each post.
Marilyn
These look so lovely, Kelly-Anne! Thank you for the tutorial. :)
ReplyDelete-Danielle
Kelly-Anne,
ReplyDeletethese little treasures are so lovely! I love making book marks too! And pincusions!!!So nice to stop by and see all that I have missed! xo
Linda
Your little pin cushions are just adorable, Kelly-Anne! I have been gifting my friends with bookmarks that I've made, after seeing yours awhile back. I think people appreciate homemade gifts.
ReplyDeleteThe pictures of Rebekah and Caleb, in your previous post, are just precious!!! You could take up photography as a profession! What a wonderful sister you are. ❤️